Showing posts with label Cards. Show all posts

Monday, February 4, 2013

Cards Sets, Stationary and Note Sets oh MY!

I have been a busy bee lately making card sets for my Etsy shop! Here are some of my new creations!
 
Set of Six Thank You notes/cards, modern patterns, blank, stationary,
 
 
 Set of four thank you note cards, stationary, patterned, thank you card set,
 
 
Set of six Birthday Cards, kids pack, handmade, stationary, happy birthday die cut, patterned card stock cards,
 
Set of four thank you note cards, stationary, patterned, thank you card set
 
 
Set of four thank you note cards, stationary, orange, patterned
 
Handmade, Embossed Card set, Valentines day, hearts,, White, Plain, Blank, card set
 
Ahhh, I love paper crafts! As always all my cards and many more other paper items are available on my Etsy Shop AlishaKayDesigns
 
AND REMEMBER ALL BLOG READERS GET 10% OFF use code BLOGREADER at checkout!


Thursday, January 31, 2013

Birthday Card Sets!

How many times can you count that someones birthday crept up on you before you had the chance to get out and get a card for them? Well for me TOO MANY times! This is why I decided to do more sets of cards in my Etsy shop, because having extra cards on hand can never be a bad thing.

New in the etsy shop this week is two different sets of birthday cards, each containing 6 cards and 6 envelopes!

This set is a colorful and fun set of all different patterned cards for anyone who has a birthday coming!

Set of Six Birthday Cards, happy birthday die cut cards set, handmade, six different designs, colorful, patterned

I made this next set with the kids in mind. With all the fun patterns and kids colors, this set is sure to put a smile on a little ones face!

Set of six Birthday Cards, kids pack, handmade, stationary, happy birthday die cut, patterned card stock cards,

Each of these Card Sets are available on my etsy store AlishaKayDesigns please check it out and remember I would LOVE to do a custom order for you if you have something particular in mind.

ALSO! Please use coupon code BLOGREADER for 10% off your order!

Thanks!


Thursday, December 13, 2012

Gearing up for the "LOVE" season!


Today I spent the day making some Valentines Day Cards! I figured I with my Parents coming to visit us for the holidays soon I better get a head start on the "next" holiday. I also had a couple new craft items that I had been itching to use for a while now, like my new heart embossing folder and the hearts border cut out punch!


These cards and more are available for purchase on my Etsy shop AlishaKayDesigns


Thursday, November 8, 2012

Die cuts for scrapbooking, cardmaking and MUCH more!

Hello All,

I just made a new listing on my Etsy Shop for Die Cuts! I love using these on my cards and want to share them with everyone now because the options are endless on what you can use these for! Please feel free to message me on my shop if you have a particular color, shape or size you are looking for, I would LOVE to do a custom order for you! AND all blog readers can use the coupon code BLOGREADER to get 10% off your first order!
Click Here To Visit My Shop


Friday, October 26, 2012

New Etsy Shop!

Hello Everyone! Boy oh boy the month of October has been super busy in many different ways. As noticed I have not been posting many crafts this month at ALL. The main reason for this was because I was gone visiting family back in MI for 3 weeks while my husband was doing dermatology rotations all over the state. After we got back home I decided to get my Etsy shop back and running since I had not been able to do much with it since being pregnant, having a newborn, taking care of my two year old, etc. SO I finally sat down crafted more cards, took pictures of them, wrote descriptions and posted them. I hope all of you take the time to check out what I have so far. Some of the cards I posted tutorials about are on there for sale and all the Halloween items are on clearance. Hope everyone has a great day and has fun crafting away! The October featured Etsy shops post is in the works and will be up in the next couple days!


Tuesday, October 16, 2012

Spooky Sparkles!

 
Yes, yes, another one of my cards. I wanted to post this card because I was surprised on how much a little glitter can make a simple patterned paper stand out better. You can use this technique on almost any patterned paper of your choice.
 
To make use this technique I simply took some patterned spider wed paper and made this card layering different papers then to make the pattern stand out a bit better I just took some good ol' Elmer's school glue and traced part of the pattern then dropped the silver glitter all over and then shook off the access, and there you have it sparkly spider webs!!


Tuesday, September 25, 2012

How to Age and Antique Paper


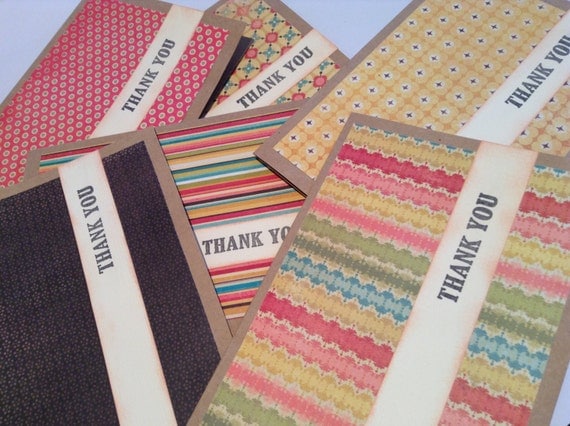
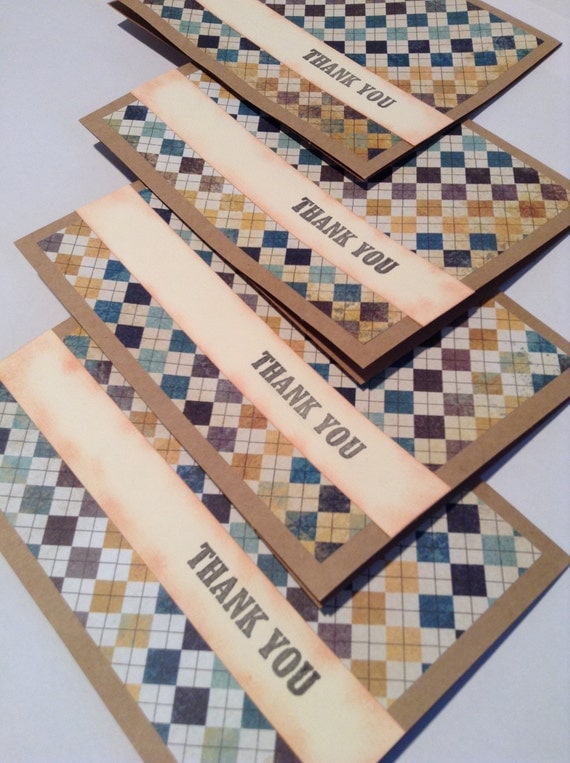
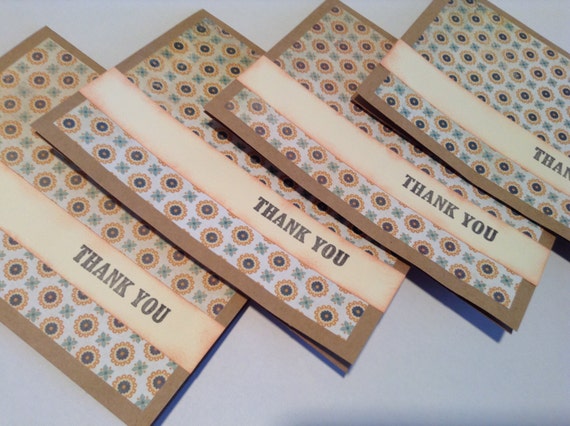
Aging paper is one of the easiest things to do and the difference and character it adds to whatever craft your doing is huge. Since I love making cards so much, sometimes its hard to find the exact quotes or saying that I want on a particular card so it is super easy for me to just type what I want and print it out off the computer.


To Make:

 
Stuff you need:
Printed Quotes, Sayings or Phrases on regular printer paper
Brewed Coffee
Scissors
Oven
Cookie Sheet
Paper towels
Distressing/Aging stain (optional)
 
Step One: Pre-heat oven to 300.
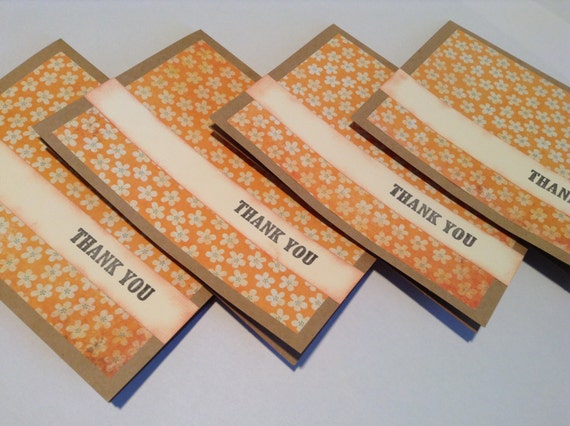
Step Two: Cut out your quotes (you can cut jagged edges to achieve the look like in the pictures here)
Step Three: Crinkle paper and place on cookie sheet.
Step Four: Pour brewed coffee over the paper, let sit for about a minute then sop up the access coffee with paper towels.
Step Five: Place in oven for about 5ish minutes until paper is dry and winkled looking
Step Six (optional): To give a more aged/antiqued look use aging paper stain around the edges.
DONE :)


Thursday, September 20, 2012

Corn on the Cob Fall Greeting Card

 
Greeting cards are SO much fun to make. I love being able to take a plain white empty card and turn it into something with meaning. I was actually inspired to make this card because I had some scrap green, orange and yellow papers laying around and I had the "Harvest Plenty" stamp so I thought of the idea to make a corn on the cob to go with it on the card! It was a little time consuming making the corn, but I was so happy with the way it turned out in the end.
 
To make the corn on the cob embellishment:
 
You need
Golden Yellow, Green and White or Cream colored card stock papers
Scissors
Glue Stick
Circle punch (small) (a hold punch may work too)
 
First cut a oval  shape out using your white or cream card stock paper. Then punch out a bunch of circle pieces using yellow and cream card stock. Glue the circle pieces starting at the bottom of the cob and layer them all the way to the top in a mixed pattern. Cut out a few green cob leafs and glue them around the cob to achieve the look (you can play around to where you want them placed and what you think looks best). When you are happy with the way it looks cut off a little of the bottom of the cob and fold over some of the cob leaf ends.


Friday, September 14, 2012

So Thankful For You Scarecrow Card


My craft passion truly is making handmade cards, they are so fun and easy to make and the options are nearly endless. I made this card a little while ago. The best part about the fall season and Halloween is being able to make these cards. I love making cards in the fall and Halloween colors. I also have SO many fall and Halloween embellishments to use it makes it easy to make all sorts of cute cards.
 
I wanted to share a technique that I used on this card with the notepaper tag.  
 
 
To Make: Things You Need
 
A piece of notebook paper
Card stock paper
Paper Stain
Twine or String
Hole puncher
Glue
 
First cut a piece of card stock paper to the size and shape of tag you want, then cut the notebook paper to the same size and shape, and glue them together (this makes it thicker). To get the distressed look, use the paper stain and slightly rub it around the edges with a sponge or cotton ball. When your satisfied with the look simply punch a hole where you want the top of the tag and string it with your twine.
 
To achieve a more distressed look you can sand the edges of the tag slightly.